Pages

Showing posts with label book of shadows. Show all posts

Friday, January 25, 2013

B- Book of Shadows Parts


Draftsman's tape is my best friend.
The Table of Contents of my BOS will not be compete until I have written on the last page. I add to it each time I have added a section and put the page number beside it.  I number the pages about 10 at a time (front only) and as I fill them I try to leave room for later additions. I will have places where I put the same category of information in two parts of the book, or in two books, no doubt. Spells will keep happening and I will record the most basic and the more elaborate along with the results.
Each entry goes in nice and straight
 thanks to the movable draftsman's tape
across the bottom.
 I record the basic ones because I look at this book as a record to succeed me for the next generation and the most elaborate because I have often not tried them before and I want to make a record and notes later.

To keep my writing nice and straight on pages where I think it is important, like this one, I use a guide of draftsman's tape along the bottom as a guide. It is white in the picture. I also took a piece of tape and marked it with writing guidelines and stuck it down the side of the page. I moved it over to the far left in the picture above, but it usually is at the margin of the contents page. Just keeping your eye on the spacing makes a big difference in how neatly you write.
Sneaky little post-it behind a page with pressed field flowers.
The flowers are awaiting a love spell worthy of them.

One other trick for writing neatly is to put VERY bold lines on a post it and stick it behind the page. You can barely see the lines but in a good light it is enough to guide me to neatnes. I like the post it because you can tilt it any way you like so you have angled lines, but not ones that look drunk. Although the curvy drunken lines have design possibilities too- I save them for my regular Art Journal.

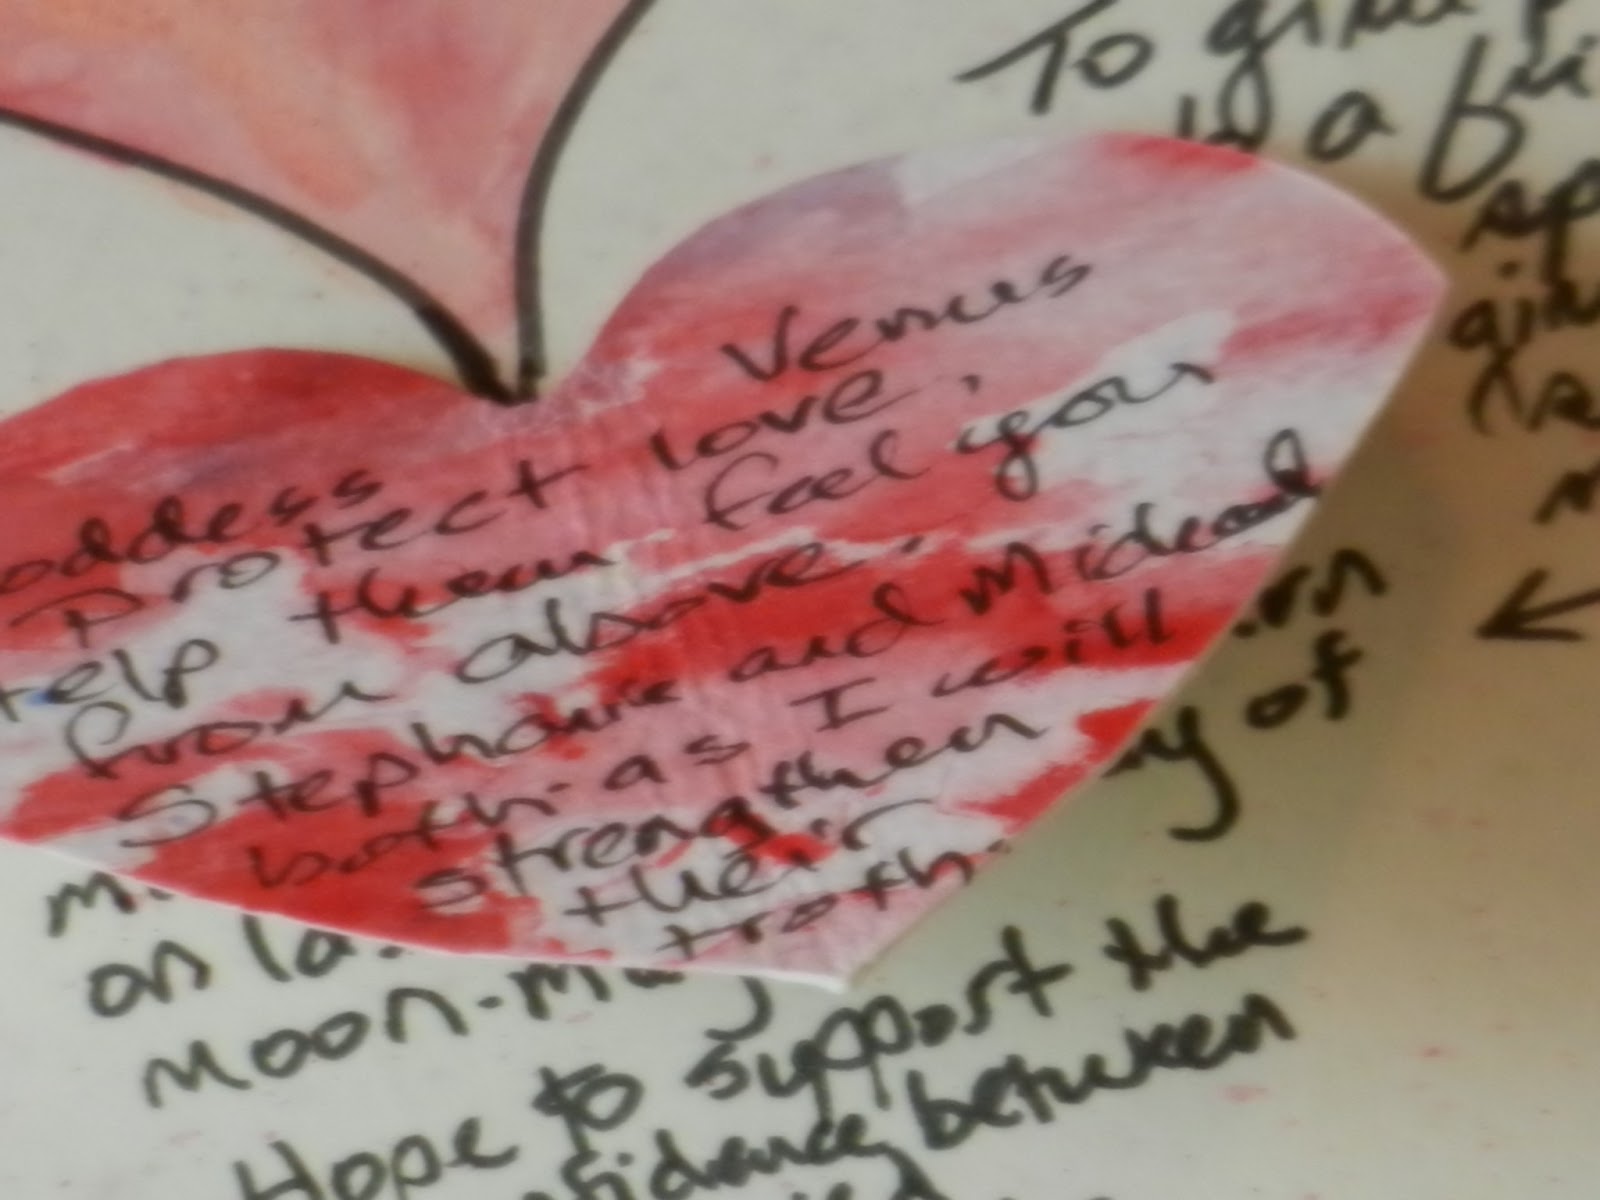
Two little tabs at the back of this heart make the hinges. When its down, you can't see the intent statement, just the charm.
When I record a spell working or a charm I often put a little flap of something beautiful on top of part of the information. So, the picture shows you the record of the charm and spell parts, but the actual spell was cast long ago and the amulet and charm were made of materials I could deliver. It is on one of the pages in the LOVE section, so the title of the section is right above them. This page just inspires me with love and I often open to it when I am working with love and commitment.

For more flaps, look back to the top of the page opposite the contents table for the watercolor leaf flap and this little darling made of vellum leaf shapes. It is tricky to get the picture, but you can see that the vellum layer has bold writing and is attached with leaf hinges cut out of the same paper. Underneath, there is a drawn  leaf shape and intent statement in fine pen.  It's it the Plants section, which is different from the Herbs section in my book.


Napping with scissors.


Probably one of my favorite sections is the Crystals section and it is one of the simplest! I put a handful of my smaller working crystals onto a digital copier and spent a day of self pampering ( at the end of a cold) drinking tea in bed and cutting them out and writing a little correspondence info for each one. I glued them with the nifty glue pen and had a great time.
Can't you picture me in pajamas, balancing tea, with a bed full of  scissors, paper snips and sharp stones? Comfy!
I originally planned to color them, but I know the colors and I love the look of the graphic black, white & gray page.

The material I use to attach things with bulk or things that can't be stuck with glue is simple paper! I just make some very snug carriers, glue them down and slide the item in. Have you tried to glue a feather and still have it look good? It can't be done, they shed everything (which is why, I'm guessing, birds are not flying around with crumbs and suet and dust and leaves stuck all over them).

The glue, tape and other tools I use are not very exotic, except for the special PVA bookmaking glue from Paper Source. It is very dry and quick- so the page doesn't buckle as its painted on and you can glue it from one edge completely to the other. Rubber cement is the same way if you use it sparingly. I love the Scotch glue pen (probably from the scrapbook section although I don't keep a scrapbook of the family record kind) because it has a sponge at one end and a little tip at the other. Precise.

The tapes are drafting tape and double sided tape. I seldom use regular desk tape in my BOS.

I try to keep my paper stash small. I am only partly successful.
 I fear what would happen if I went into the scrapbook aisle.
I saved the bast for last- PAPER!  Any paper is fair game for a decoration in an Art Journal but the papers for my BOS run to two groups: functional and dull or unusual and limited. Below are both: a little envelope for carrying a poppet, charm or sigil and paper strips offcut from some flash cards I made this week for a student. They can become terrific things or be used to patch, hinge or tie down something more interesting. The brown handmade journal on the bottom is really one text block of a larger journal I made, but this one was damaged so it has been demoted to the paper box to be cut up.

Since some of my studies and work are of the local Pennsylvania German folk magic I have manuscript sized pages copied from a local 19th C German language newspaper which I have distressed with all manner of things. Some of it I use for book covers and some has been cut up for borders, sigils and other work. Lots of the ads on the back are for herbal cures of the time, dowsers and other services done with energy. (I interview people which is easier to do than you would think- ("aunts and parents"- they will seldom admit to using folk magic themselves even though they report activities and traditions to me that clearly ARE folk work. I find that many of the traditions of people I meet have not changed that much from what I read in the few 19th C texts published around here in German and translated).

The rare papers are personal to me- paper from Nepal that my Dad brought me after he returned from living in an orphanage in Nepal run by Curry without Worry. He was teaching higher math there. The blue vellum paper is probably the only commercial scrapbook paper- also from a family member and I am a sucker for see through layers!

The plain journals from Moleskine come with a pocket in the back. In there I keep vellum envelopes (I crinkled one to see how it would look and I think It will look great holding something dark!). I can glue them into the book or use them to hold something I will later burn. A business card for a really good Occult shop I visited and some notes to add to the journal later. Last, there is a little strip of paper from the same journal paper just to cut up and make a patch when my ink goes blob or my head can't spell. Which is pretty regularly.

Friday, January 18, 2013

B: Book of Shadows

My tool carrier full of drawing supplies can move with me to wherever I am working on my BOS.
I remember how curious I was about contemporary books of shadows. I could get an idea of the ancient, illuminated super fancy ones of the past, but what about today's? Surely everyone is not supposed to have that level of skill and time for this? Will an incantation written on a bar napkin or a legal pad work?

Good news, of course they will. Especially if your working involves a bartender or a lawyer.

But since I wondered, I bet some of you wonder. Today's Pagan Blog Project contribution is a little tour of what goes into making my own BOS.
I only use Red for my Book of Shadows      photo: Treehugger .com

The Book itself
is a red Moleskine hard cover 5" x 8.5" Artists Journal  I have been keeping black hardcover Moleskine journals full of ideas and sketches for years. I love that they have that nifty little elastic band attached to keep them closed and a pocket in the back. They also have that fancy pantsy ribbon to mark your page. I am a sucker for those.
Top, black everyday journal, bottom, BOS


Paper
I addition to the archival paper in the journal I have glued paper from old BOS books into my present BOS. I never kept one as nicely as this before, it was more like just running lab notes.  I don't think I'm going to move things forward anymore, just begin a second red journal when this one fills.  I'm not super fussy about what I attach to this book, index card stock, notebook paper, feathers and pressed flowers as well as copier paper all are in there.

Pens and ink
Writers and Artisits can be really emotional about pens. I have only put on the table the ones I am using frequently on my BOS, but as you can see, I have a whole zinc tool carrier full of glass cups and each of THOSE is full of pens, pencils brushes and other journaling supplies.It sits on my beautiful oval walnut desk (the first desk I ever picked out for myself!) and does its "let's not get too serious here" job.  Fine lines, permanent ink and beautiful lettering are my needs in a pen. I use Pigma Microns and Staedtler fineliners have been my faves ever since I found them a l o n g time ago. I have a Hunt quill and Speedball calligraphy pen for dipping into ink too. Last, I have Noodlers fountian pens- the black one is extra flexible for sketching and the orange one is stiff for writing. I also love Noodlers ink, they make great products and the packaging is full of rambling thoughts of the owner. check out the reasonably priced pens and ink at Goulet Pens.

Beloved watercolor pencils turn my sketches into paintings!
Coloring
Oh! What can you say about coloring? I love it, and I always do it after the drawing part. I have found that even when I use a paintbrush I seem to always draw, so now I stick to sketching my ideas into my BOS, lettering things carefully and then going back in and adding color to the pages on another day.  The Noodler's inks that I use are called "bulletproof" and are made for security on documents. Not only do they not run, they can't (according to the package) be removed by bleach, oven cleaner or any other method check forgers know about.


I love using watercolor pencils by Prismacolor and also Derwent pencils. It's like a paint with water picture, you just draw, wet your brush with plain water and brush over the parts you want to smooth or blend. Magical! Sometimes I will use my regular journal to make notes about something that I will later do up nicely in my BOS. Sometimes I just dive right in. It's not supposed to be perfect, it's supposed to be personal.

Next week: more Book of Shadows...
Catagories and how I keep track,
other inclusions and ways to attach them.
hinge, hanger, tuck, pocket, glue

Friday, January 11, 2013

A is for Amulet charm bundle

Many years ago I wondered what a REAL Book of Shadows looked like. Mine looks like this. 
Amulets are one of my favorite things to make, and a really nice way to bear in mind an intention you are working to make real. They are like little tangible thoughts, and may be accompanied by gestures, words or sigils. A charm can just BE a word or sigil, it you desire. If it is a word, you can time it so it is said at the perfect moment, when the sun just sets or when you drop a bulb into a hole. 

The charms I make address a specific intent, like protection, love or attraction.  The right time of the moon is always taken into consideration, waning, waxing or Full. I don't make charms on the New moon, it is time for other things. I think of a charm as an offering for the Goddess I ask to help, a focus to frequently remind me of the intention I held while making it and to act as a passive reminder.  In my studies of local Pennsylvania and other rural folk magic and medicine there is frequent use of verbal and bundle charms. The amulet I am sharing today is a bundle charm.

Hand sewing is something I love, it is meditative and takes time. So, I gather my hand sewing supplies and some linen fabric too make the outside of the amulet, the bag. 
Using a rectangle about 2" by 4" folded it in half I stitch around the outside edge on two sides. One side is open, so the square is turned inside out, edges pressed with the bone folder (in the picture I have one carved like a feather) and stitched again with linen thread all the way around 3 sides. Fold the raw edges of the forth side in and stitch it partway shut.  These two seams are tight enough to hold herbs or salt inside the bag.

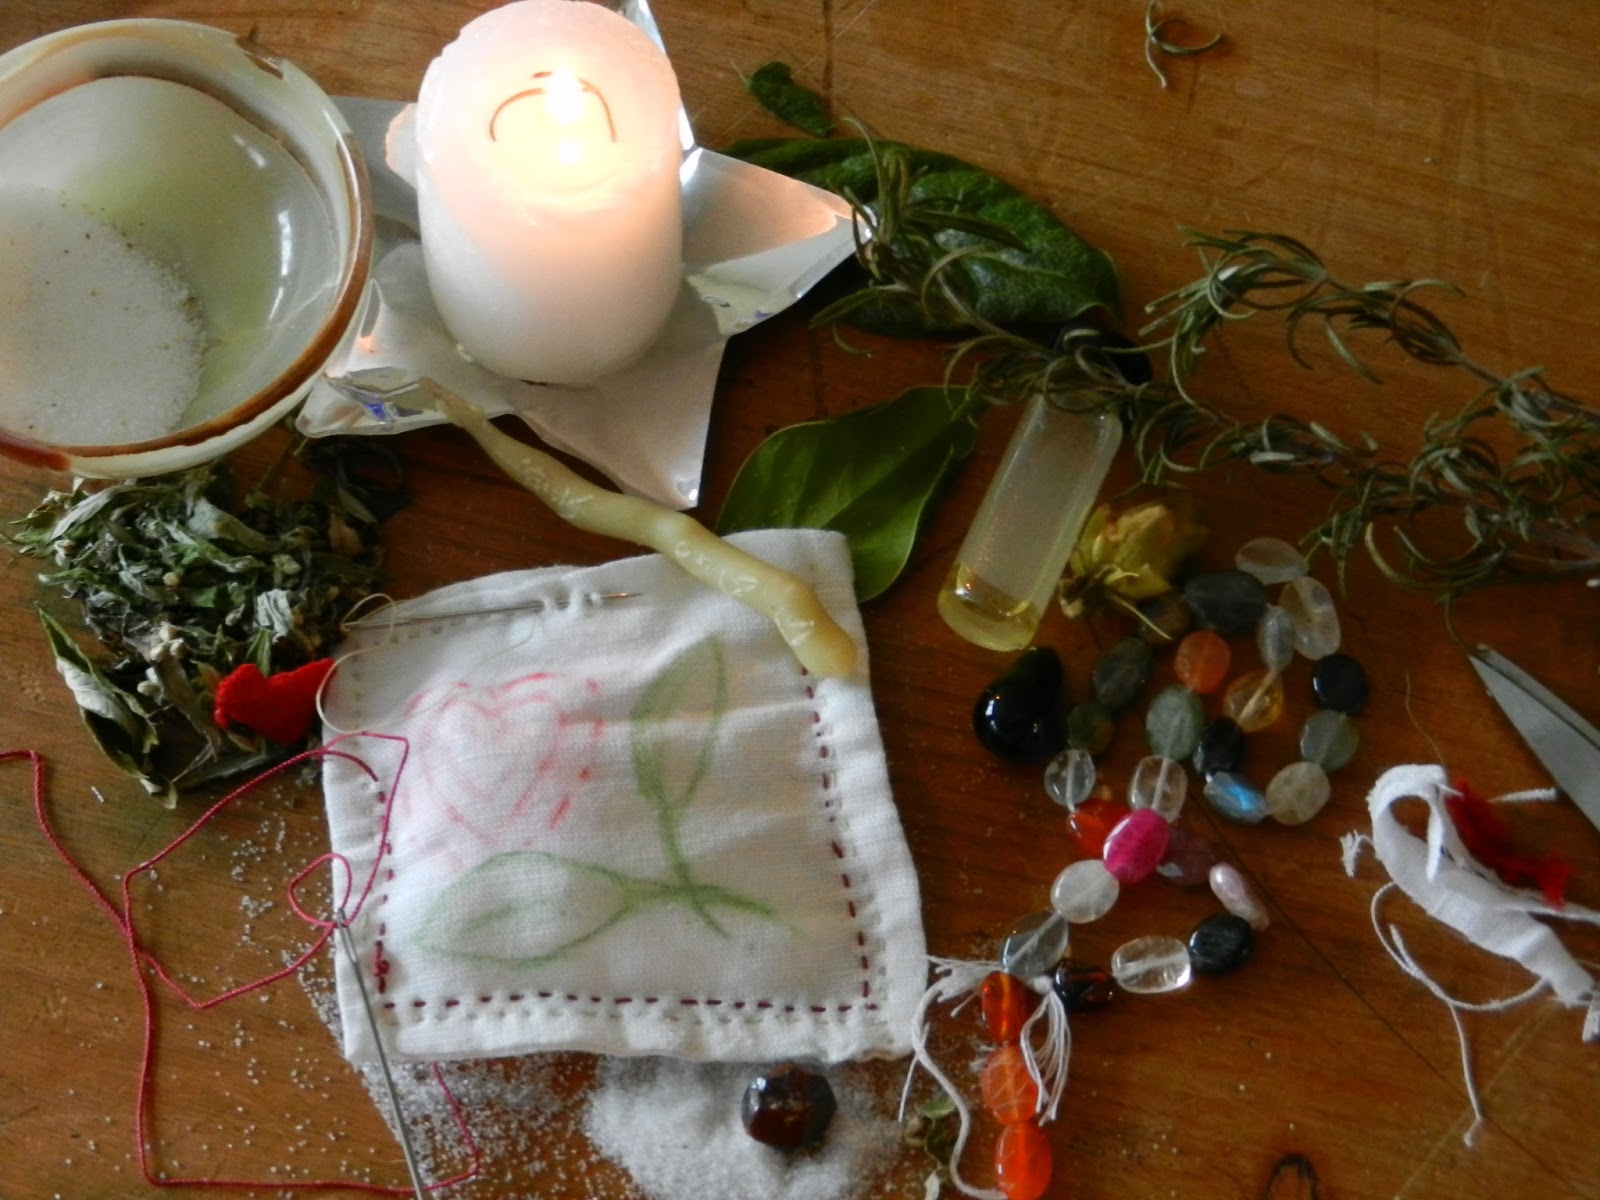
Now is the time to get the rest of the amulet supplies you will need. You know what you need to do your magic work, I can only show you a bit of what you might find here.

I gather my sewing supplies and stitch two sides of my folded linen rectangle using plain thread. Also pictured, red silk thread, needle case with spare horn buttons attached, carved bone folder, blue checked linen I didn't need today, thimble.
 Folk magic uses red thread and salt frequently, so before I begin the filling I make a final round of stitches using red silk thread. My desire is knotted into the red thread, in this case I made 5 knots, you can see them in the last picture. I stopped the red stitches short of the opening too. Salt, rosemary, quartz, a tiny felt heart and my words to Brigid and Aphrodidte went inside.
Linen fabric, sewing tools, little gemstones (I buy them on strings) salt, anointing oil, your hair, or your written intent could go into the amulet. I also included herbs and a small candle made of beeswax and an old earring from my hubby.

Note to the goddesses I am addressing on linen.
String of gems to choose from. Anointing oil and salt.
On different page of my BOS I recorded the details of a special
amulet a fellow asked me to make for his uniform coat.


 Include what ever things support your intentions and work to your purpose.
Of course the salt goes everywhere! Mugwort, rosemary, garnet and red wool heart went in next along with the candle.
When filled and stitched, my amulet was dedicated  and anointed before I put out the candle I used to focus.
See the place of 5 little knots in the red thread?


The soldier's protection and wholeness amulet was sewn within the coat itself, but you can feel it through the pocket.

Carry yours in your pocket or around your neck, or place it in a room or in the garden.


Thursday, January 3, 2013

Pagan Blog Project

I'm excited to participate in the Pagan Blog Project for 2013. I followed many of the posts last year and was inspired by reading the many different takes on our pagan practice. I envision most of the things I can contribute will be about how I practice my craft, things I do, make or see.
I have been doing this for a l-o-n-g time and have evolved. I learned very basic practices from a Wise Woman in the northern Appalachian Mountains where I grew up.  I gleaned from the "odd traditions" my Irish female relatives had and my children gleaned the same way from me- by observing how we celebrate (however, I explained things too).  Lots study and formality of rituals followed (and has its place), and while I retain some ritual formality, this circle has come around to the basic practices as I grow more confident and older.

I held back, hoping to acquire more skills and become better at working this blog- frankly, without a regular post I find myself avoiding the discomfort of possibly embarrassing myself. We all know how this goes.

It looks like the best way to develop better blogging skills is to plunge in and go ahead and be bad at the blogging technicalities. I'm ready to do it wrong, break rules and later find out they exist (like- always attribute pictures- I KNOW! I wouldn't lift things in my print life, I never even thought about grabbing a pic I had filed and using it without saying where I took it from. Duh. I have no idea where some of these pics started, but I should have). So, borrowed pictures: my first embarrassment and a big one. How bad could the next one be, right? If I let mistakes keep me from blogging this year I'm never going to do it.

If you are unfamiliar, this is the Project:  It is a week by week opportunity for me to share, for you to learn from me. Conversely  I get to learn from everyone else who participates and also to grow from the interaction in the PBP forum and from your comments. Please comment (I would have loved someone to send me a gentle reminder about the pictures... that could have been you).
The schedule for posting follows the calender and the alphabet. One each Friday as follows:

January 4 and 11, topics beginning with A: apples, astral travel, agrimony...
January 18 and 25, topics for B: Brigid, basil, baneful herbs, boxwood, Bast...
52 Posts over a year's time. Or a year and a day, I like to think.

You get the idea. Nearly 200 blogs all contribuiting to this complex topic- its the biggest Book of Shadows ever undertaken. learn more about it here: Pagan Blog Project details