Pages

Showing posts with label folklore. Show all posts

Friday, March 8, 2013

E- Eggs for Ostara


I colored eggs with lots of different natural dyes last year, some worked well, some did not.

This year I gave up on spinach, carrot and turmeric and made eggs colored with the things that worked best last year.

Black tea.

Black walnut hulls.

Onion Skins.

And my favorite:

Red cabbage!

This makes a beautiful dark purple blue that becomes bluer as it sits overnight. The high ph of the eggshell turns it a gorgeous shade of blue. Here is how I did it:


Chop up half a red cabbage from the grocery. put it in enough water to cover. boil one hour, adding water to keep it covered. 
Magic floating egg cartons!
Strain the pale purple chopped cabbage from the dark water. I served my cooked cabbage for dinner with vinegar and sugar and black pepper. 

The water looks really dark but it takes a long time to color the eggs.

Cool the liquid and add raw white eggs and 1/2 tsp salt. Boil the eggs the same way you make hard boiled eggs. remove the pot from the heat, add 1 tbsp vinegar and leave in the water overnight. If you plan to eat the eggs, do this overnight int he fridge.
When you remove the eggs from the vinegar water they will be purplish but  in the air they will become bluer.
Eggs in cabbage vinegar water.
I love the reflection .

Voila! Gorgeous eggs.  The lighter blue ones were cooked in the same water the next day. I bet I could have made another batch in that water, but I needed the pot.


Really big beets. No dice.


Beets were disappointing. They stained me, the counter, spoon and cutting board red but the eggs came out beige! I tried twice, because I am stubborn. I recolored those eggs with more onion skins.

Dilute onion skin water- maybe yellow?


The four red and gold ones at the top of the egg box and all of the ones in the box to the right were colored with the skins from one bag of yellow onions. Boiled in the colored water and then soaked overnight, they are almost red, especially if you begin with brown eggs!

The pale greenish ones are calendula flower petals- unimpresive to me. I overdyed two of those in cabbage water- they are army green.

Another way to decorate eggs is the PA Deutsche traditional scratched design. It is an art that began in Europe and came here in the 18th Century, but has nearly died out now.

You can see one I began working on in the bowl of really dark colored eggs I made just for scratching. Black tea or walnut hulls for browns, cabbage for the navy blue-black ones, the red are onion skin.

Scratched eggs will be for another post, but that is why I made the very dark colored eggs.
It's snowing right now, but I am going camping tomorrow and bringing these to the 18th C farm we are staying on. I will scratch them with traditional 18th C patterns representing power and blessings of the returning Spring. There are a few extant examples and a few reports of the work, but several  19th C newspaper photographs and reports of family eggs handed down 3 generations. The ones thought to bestow power or blessings were traditionally not kept but broken and buried when the work was done. 

Friday, March 1, 2013

E- Ellen Dugan Garden Witch


Ellen Dugan's books are a great inspiration to me and they are beautiful and thoughtfully written.  If you haven't checked her out, then do!

She published the Witches Tarot through Llewellyn Worldwide.

Pretty and educational!


Her Garden Herbal is one of my favorite books, and her other garden witchcraft books are wonderful too!

Check out Ellen' site at: Ellen's pages and blog she is my E choice for the Pagan Blog Project.


Friday, February 22, 2013

D- Deer

Can you find two deer in this picture?
I see deer in my yard in the morning because I live in their bedroom.  The dogs look our the large glass doors in the back (through which these pictures were taken) and bark.  And bark and bark and bark.  Deer are smarter than dogs, they look up but soon go back to sleep or have a snack.

Left deer.
I love that they visit me and that they can sleep late because they can't be hunted here so near my house.

I have no objection to hunting though. I have some friends who are pagans AND hunters, and their approach to taking a deer is beautiful, sound and respectful.

Right deer. You can tell she is laughing at the dogs wigging out by my feet.
At least one of them makes offerings to Diana at his place of worship near a small spring. She is ever present with him as he hunts and his offerings of thanks to her this year were truly moving. My friend is a Longhunter, he hunts with a flintlock and so he has one shot and one charge of gunpowder to spend. His skill and patience have to do the rest. Longhunter feels that this deer gives up her life for the hunt to continue and to help keep the connection between the God and the Wood strong.  Some of his prize is returned to the ground before any is consumed.

I have found that I can be both proud and saddened when an animal gives its life for my use.

Here in PA, a lot of jobs depend on the hunting activities. Deer is good food and oh, a bunch of other things...  I'm not meaning to sell you on hunting- if it is not for you I respect your choice to steward the earth in a different way very much.

What I AM meaning to do is represent deer as a path to appreciating the natural world around us.

Deer represent so many good things- they are not my totem animal (so far...) but they are wonderful herbalists- said to lead Native Americans to healing plants and as we can see, they are creative and frugal and good at blending in when needed.  Deer are swift, fertile and live efficiently- all qualities I admire and don't mind being reminded of!  Spiritually, they are harmonious and balanced and interact well with others.  They represent the rut in the Midsummer fertility festivals- that is where we get the term Stag Party!  A deer-like man adorned with an antler crown and possessing some of these qualities would be a good choice to end your chase and mate with at Beltane!

I don't live in the middle of nowhere, my area is solid suburbs. These deer live in 20 foot wide by 600 foot long strips between backyards, occasional empty acres in our town and the wooded areas along the highway.  PEOPLE have crowded them until they have been squiched into that space.  A lot of them don't make it under these circumstances, but I am grateful for the ones who show up and share themselves with us.
I will need to fortify our garden beds around my circle garden with a fence if I want to grown anything other than herbs, because These Gals used my garden as a salad bar last summer.  They even ate the hot peppers!
Garden raiders or not, I look forward to them every morning.
Deer need salad too!
Zambonie (@Zambonieknows) the feathered white Dachshund  takes a break from barking at deer to
practice a  little sympathetic magic.  Her belief in this position is very strong.
  "I can roll up in a ball and the deer will come lay here with me. Please stop typing and take my picture."
Read about other notions and pagan practices that begin with the letter D at the Pagan Blog Project.

Friday, January 25, 2013

B- Book of Shadows Parts


Draftsman's tape is my best friend.
The Table of Contents of my BOS will not be compete until I have written on the last page. I add to it each time I have added a section and put the page number beside it.  I number the pages about 10 at a time (front only) and as I fill them I try to leave room for later additions. I will have places where I put the same category of information in two parts of the book, or in two books, no doubt. Spells will keep happening and I will record the most basic and the more elaborate along with the results.
Each entry goes in nice and straight
 thanks to the movable draftsman's tape
across the bottom.
 I record the basic ones because I look at this book as a record to succeed me for the next generation and the most elaborate because I have often not tried them before and I want to make a record and notes later.

To keep my writing nice and straight on pages where I think it is important, like this one, I use a guide of draftsman's tape along the bottom as a guide. It is white in the picture. I also took a piece of tape and marked it with writing guidelines and stuck it down the side of the page. I moved it over to the far left in the picture above, but it usually is at the margin of the contents page. Just keeping your eye on the spacing makes a big difference in how neatly you write.
Sneaky little post-it behind a page with pressed field flowers.
The flowers are awaiting a love spell worthy of them.

One other trick for writing neatly is to put VERY bold lines on a post it and stick it behind the page. You can barely see the lines but in a good light it is enough to guide me to neatnes. I like the post it because you can tilt it any way you like so you have angled lines, but not ones that look drunk. Although the curvy drunken lines have design possibilities too- I save them for my regular Art Journal.

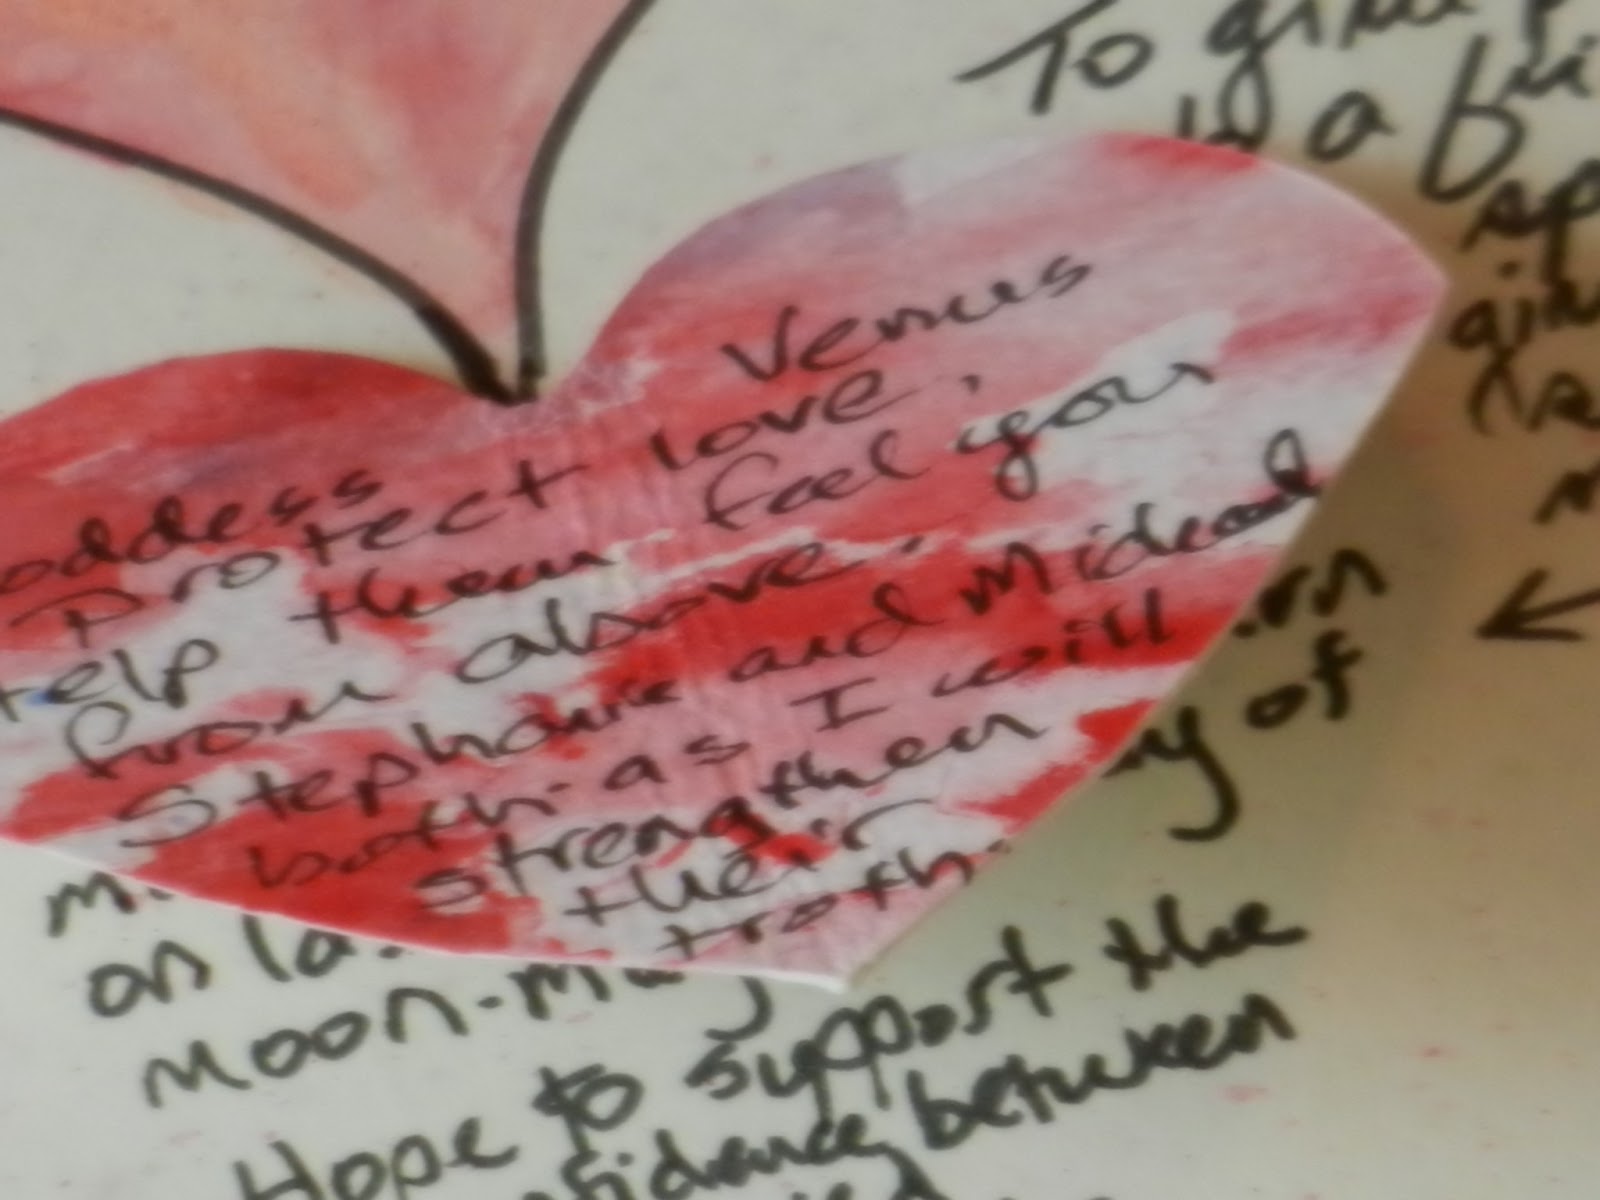
Two little tabs at the back of this heart make the hinges. When its down, you can't see the intent statement, just the charm.
When I record a spell working or a charm I often put a little flap of something beautiful on top of part of the information. So, the picture shows you the record of the charm and spell parts, but the actual spell was cast long ago and the amulet and charm were made of materials I could deliver. It is on one of the pages in the LOVE section, so the title of the section is right above them. This page just inspires me with love and I often open to it when I am working with love and commitment.

For more flaps, look back to the top of the page opposite the contents table for the watercolor leaf flap and this little darling made of vellum leaf shapes. It is tricky to get the picture, but you can see that the vellum layer has bold writing and is attached with leaf hinges cut out of the same paper. Underneath, there is a drawn  leaf shape and intent statement in fine pen.  It's it the Plants section, which is different from the Herbs section in my book.


Napping with scissors.


Probably one of my favorite sections is the Crystals section and it is one of the simplest! I put a handful of my smaller working crystals onto a digital copier and spent a day of self pampering ( at the end of a cold) drinking tea in bed and cutting them out and writing a little correspondence info for each one. I glued them with the nifty glue pen and had a great time.
Can't you picture me in pajamas, balancing tea, with a bed full of  scissors, paper snips and sharp stones? Comfy!
I originally planned to color them, but I know the colors and I love the look of the graphic black, white & gray page.

The material I use to attach things with bulk or things that can't be stuck with glue is simple paper! I just make some very snug carriers, glue them down and slide the item in. Have you tried to glue a feather and still have it look good? It can't be done, they shed everything (which is why, I'm guessing, birds are not flying around with crumbs and suet and dust and leaves stuck all over them).

The glue, tape and other tools I use are not very exotic, except for the special PVA bookmaking glue from Paper Source. It is very dry and quick- so the page doesn't buckle as its painted on and you can glue it from one edge completely to the other. Rubber cement is the same way if you use it sparingly. I love the Scotch glue pen (probably from the scrapbook section although I don't keep a scrapbook of the family record kind) because it has a sponge at one end and a little tip at the other. Precise.

The tapes are drafting tape and double sided tape. I seldom use regular desk tape in my BOS.

I try to keep my paper stash small. I am only partly successful.
 I fear what would happen if I went into the scrapbook aisle.
I saved the bast for last- PAPER!  Any paper is fair game for a decoration in an Art Journal but the papers for my BOS run to two groups: functional and dull or unusual and limited. Below are both: a little envelope for carrying a poppet, charm or sigil and paper strips offcut from some flash cards I made this week for a student. They can become terrific things or be used to patch, hinge or tie down something more interesting. The brown handmade journal on the bottom is really one text block of a larger journal I made, but this one was damaged so it has been demoted to the paper box to be cut up.

Since some of my studies and work are of the local Pennsylvania German folk magic I have manuscript sized pages copied from a local 19th C German language newspaper which I have distressed with all manner of things. Some of it I use for book covers and some has been cut up for borders, sigils and other work. Lots of the ads on the back are for herbal cures of the time, dowsers and other services done with energy. (I interview people which is easier to do than you would think- ("aunts and parents"- they will seldom admit to using folk magic themselves even though they report activities and traditions to me that clearly ARE folk work. I find that many of the traditions of people I meet have not changed that much from what I read in the few 19th C texts published around here in German and translated).

The rare papers are personal to me- paper from Nepal that my Dad brought me after he returned from living in an orphanage in Nepal run by Curry without Worry. He was teaching higher math there. The blue vellum paper is probably the only commercial scrapbook paper- also from a family member and I am a sucker for see through layers!

The plain journals from Moleskine come with a pocket in the back. In there I keep vellum envelopes (I crinkled one to see how it would look and I think It will look great holding something dark!). I can glue them into the book or use them to hold something I will later burn. A business card for a really good Occult shop I visited and some notes to add to the journal later. Last, there is a little strip of paper from the same journal paper just to cut up and make a patch when my ink goes blob or my head can't spell. Which is pretty regularly.

Friday, January 11, 2013

A is for Amulet charm bundle

Many years ago I wondered what a REAL Book of Shadows looked like. Mine looks like this. 
Amulets are one of my favorite things to make, and a really nice way to bear in mind an intention you are working to make real. They are like little tangible thoughts, and may be accompanied by gestures, words or sigils. A charm can just BE a word or sigil, it you desire. If it is a word, you can time it so it is said at the perfect moment, when the sun just sets or when you drop a bulb into a hole. 

The charms I make address a specific intent, like protection, love or attraction.  The right time of the moon is always taken into consideration, waning, waxing or Full. I don't make charms on the New moon, it is time for other things. I think of a charm as an offering for the Goddess I ask to help, a focus to frequently remind me of the intention I held while making it and to act as a passive reminder.  In my studies of local Pennsylvania and other rural folk magic and medicine there is frequent use of verbal and bundle charms. The amulet I am sharing today is a bundle charm.

Hand sewing is something I love, it is meditative and takes time. So, I gather my hand sewing supplies and some linen fabric too make the outside of the amulet, the bag. 
Using a rectangle about 2" by 4" folded it in half I stitch around the outside edge on two sides. One side is open, so the square is turned inside out, edges pressed with the bone folder (in the picture I have one carved like a feather) and stitched again with linen thread all the way around 3 sides. Fold the raw edges of the forth side in and stitch it partway shut.  These two seams are tight enough to hold herbs or salt inside the bag.

Now is the time to get the rest of the amulet supplies you will need. You know what you need to do your magic work, I can only show you a bit of what you might find here.

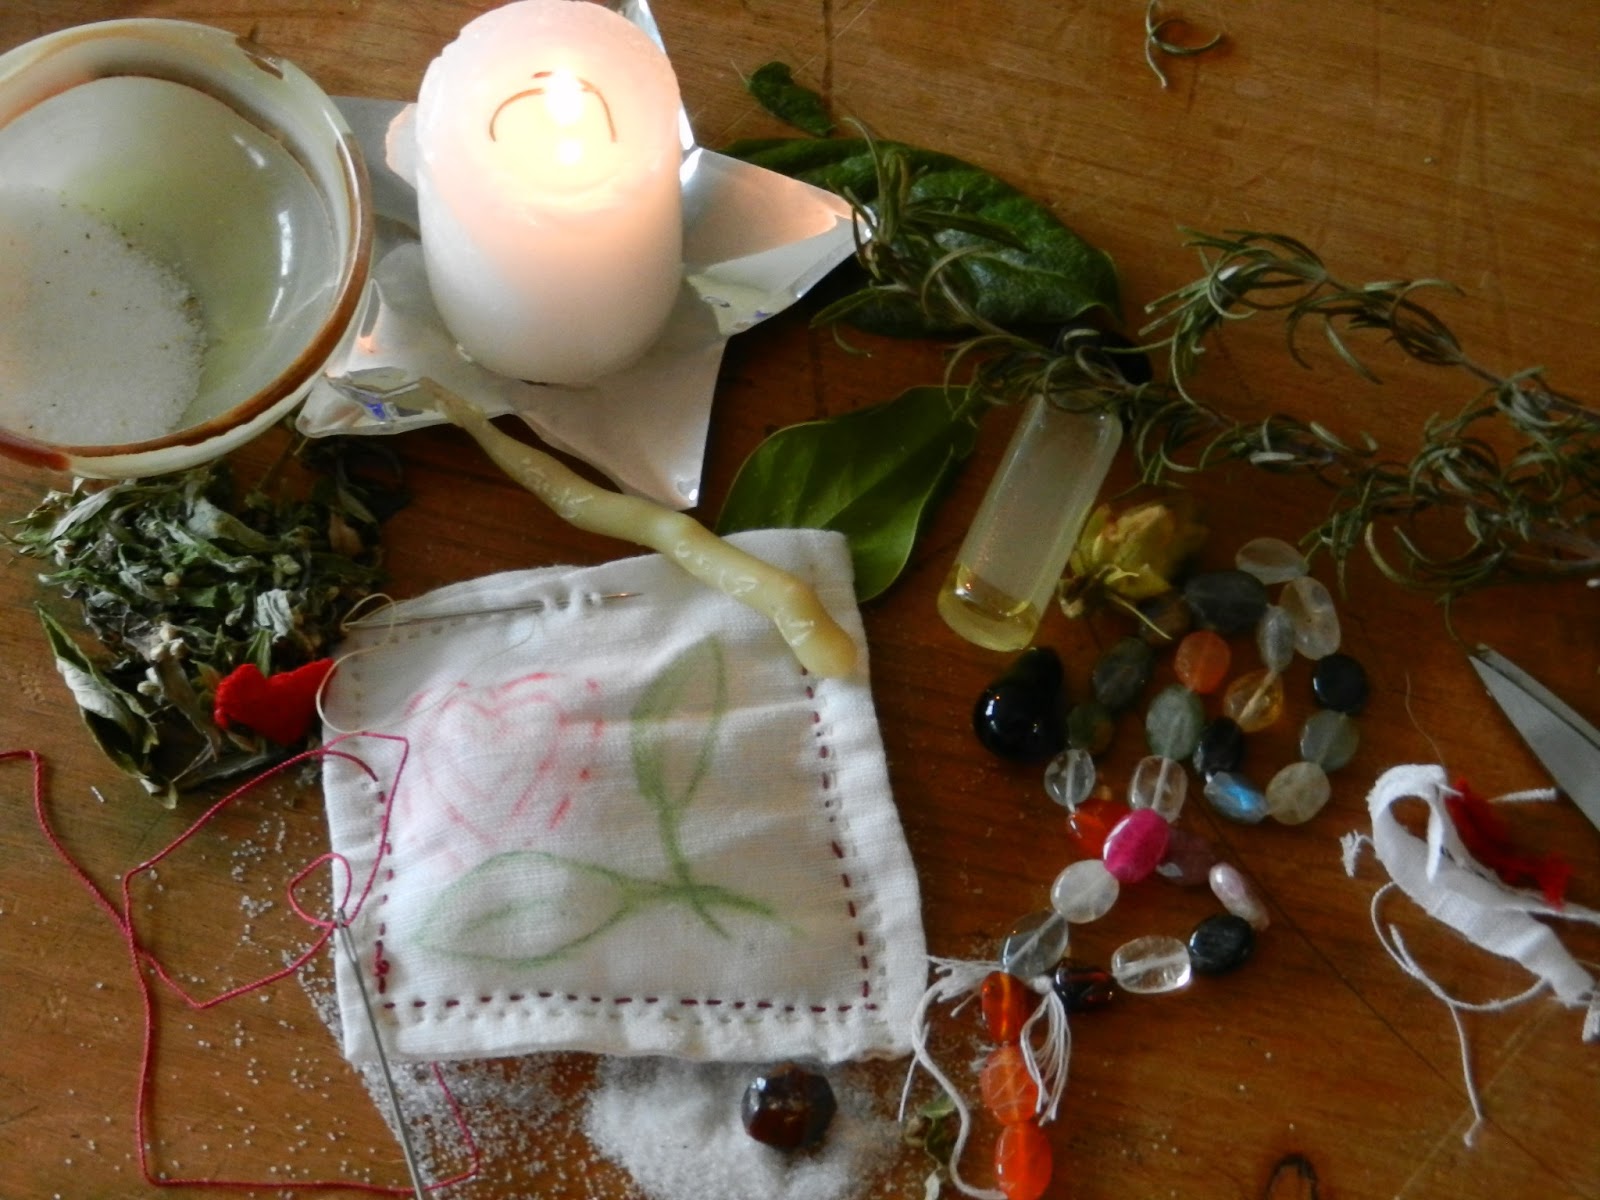
I gather my sewing supplies and stitch two sides of my folded linen rectangle using plain thread. Also pictured, red silk thread, needle case with spare horn buttons attached, carved bone folder, blue checked linen I didn't need today, thimble.
 Folk magic uses red thread and salt frequently, so before I begin the filling I make a final round of stitches using red silk thread. My desire is knotted into the red thread, in this case I made 5 knots, you can see them in the last picture. I stopped the red stitches short of the opening too. Salt, rosemary, quartz, a tiny felt heart and my words to Brigid and Aphrodidte went inside.
Linen fabric, sewing tools, little gemstones (I buy them on strings) salt, anointing oil, your hair, or your written intent could go into the amulet. I also included herbs and a small candle made of beeswax and an old earring from my hubby.

Note to the goddesses I am addressing on linen.
String of gems to choose from. Anointing oil and salt.
On different page of my BOS I recorded the details of a special
amulet a fellow asked me to make for his uniform coat.


 Include what ever things support your intentions and work to your purpose.
Of course the salt goes everywhere! Mugwort, rosemary, garnet and red wool heart went in next along with the candle.
When filled and stitched, my amulet was dedicated  and anointed before I put out the candle I used to focus.
See the place of 5 little knots in the red thread?


The soldier's protection and wholeness amulet was sewn within the coat itself, but you can feel it through the pocket.

Carry yours in your pocket or around your neck, or place it in a room or in the garden.


Thursday, February 2, 2012

Imbolc Wistlepig

Tradition calls for a badger (groundhog, whistlepig), snake
or hedgehog to make an appearance on February 2.
It all depends on where you call home.

 Imbolc is here and all we have to show that Spring will arrive soon is mud!  Here in PA, the tradition of the groundhog seeing his shadow is astonishingly central to people's midwinter conversations.  I have plans for a nice celebration with others in my circle on Saturday night... a meal of milk foods and fresh breads, a fire and the making of traditional wheat crosses.  I will put a bowl of holly and ice cubes (for we are without snow) to melt and remind us that the thaw is sure to come now that the days are longer.

In this part of PA, German families have held the fort since the mid 1600's, and with them many traditions found in few other places.  Midwinter celebrations among the old wise ones of Germany included watching a badger's hole. If the day was sunny, 6 more weeks of winter, if clouds rule the day, the badger may emerge as a sign winter is at its end.